Johanna of the Passionate Cook was very enthusiastically encouraging us to create one of the more lusciously delicious concoctions man has ever created - chocolate truffles. I've always wanted to make one of these little pieces of delight. The sheer sensation of creamy melting chocolate in my mouth sealed my decision to participate in this 25th edition of the SHF.
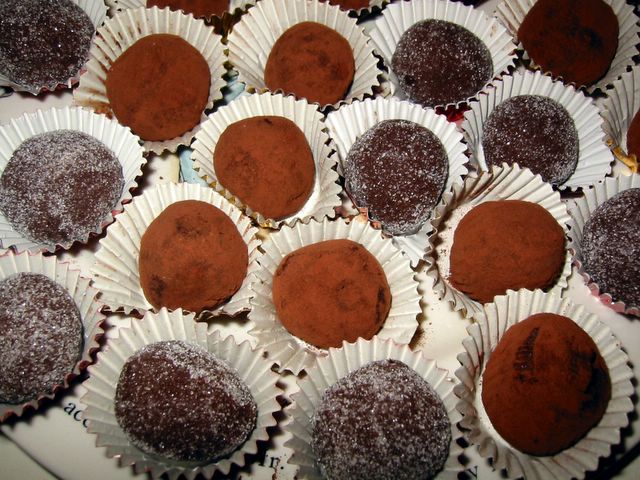
I wanted to create truffles that my kids would want to eat. So bitter chocolate is out while a little bit of sugar is in. This recipe I adapted from Phil Vickery's A Passion for Puddings cookbook was a little bit unusual since it uses condensed milk. I was a bit skeptical if it will be as meltingly luscious as ones made with double creams but it did convincingly deliver. The orange liquor had to be replaced with just normal orange extract for my kids' sake and although I didn't have any orange zest it was orangy enough to our taste. The ultimate taste was whether my kids will eat it. Well, as of this time they have eaten one each and reached for more. They naturally gravitated for ones rolled in vanilla sugar so I'll definitely remember that next time I make more of these moreish cloud of chocolate heaven.
Chocolate & Orange Truffle
200 g dark chocolate (70% cocoa solids)
300 g condensed milk
3 Tbsp double cream (heavy cream)
2 Tbsp orange liqueur or 1 tsp orange extract
finely grated zest of one orange (optional)
cocoa powder or icing sugar or vanilla sugar
- Melt chocolate, double cream, and condensed milk in a heatproof bowl over simmering water in a saucepan.
- Mix in the orange liqueur or orange extract and zest (if using).
- Remove from heat and cool completely to room temperature.
- Cover and chill in the fridge for about 4 hours or overnight.
- Spread cocoa powder or sugar on a wide plate.
- Have a bowl of iced water in your working area.
- Using a teaspoon, scoop a teaspoonful of the chocolate mixture and shape into balls using your hands then roll on the cocoa powder or sugar. Repeat until you have used up all the truffle mixture. Dip your hands from time to time in the iced water to cool it down and prevent the melting of the truffles while you're rolling it.
- Chill in the fridge.

I miss the old IMBB food blogging event. I liked the idea of setting a theme and have bloggers submit entries ranging from starter to mains to desserts or even cocktails. Unfortunately it seems to have ceased operation and there seems to be no regeneration in sight. Blogging events challenge me to seek out new recipes or new ingredients which I would not normally cook. For me, that's the main draw other than the excitement of looking at the rest of the entries come roundup time. The range and variety of the entries usually sparks an idea or makes me want to try a few.
I've seen the Weekend Cookbook blogging event quite sometime now (usually hosted and originally conceived by Sara of I Like To Cook). And I've filed away at the back of my mind a reminder to participate when time permits me. Sadly it's only now that I had a chance to write up an entry.
For the 11th edition of the Weekend Cookbook Challenge, which has a theme of party, I'm posting the chocolate birthday cake I made for J2's birthday a few weeks ago. Actually the last week of October and first week of November is a flurry of birthdays in our family. I was completely chocolated-out because of the series of chocolate cakes we consumed within days of each other in which this was the first one. *sigh*
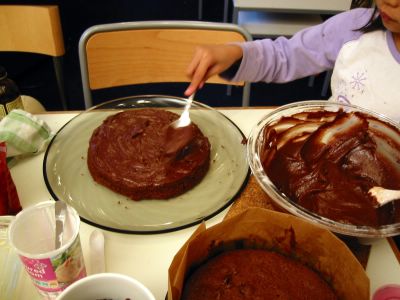
No party is complete without a cake, isn't it? What better way than having a good 'ol chocolate cake - nothing fancy, no exotic ingredient from a far flung land - just your standard reliable yummy birthday cake. In the time honored tradition of my baking sojourns I made a mistake - as usual. The recipe called for 1 1/2 sticks butter but somehow in the confusion and mayhem in the kitchen I put in 1 1/2 cups! That's double the amount! I was quietly fuming why this cookbook had sticks measurements. Then I remembered it was given to me by a blogging friend in America. Duh! Thank goodness it did not ruin the cake. Actually it made it extra moist which made me wonder how it would turn out with half the butter. We all loved the cake but the icing was too sweet for us. So I might hunt for other icing recipes out there or reduce the sugar though my youngest had a great time slathering it on, between, and around the cake layers.
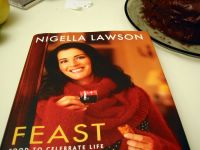
This yummy cake recipe is adapted from the cookbook Feast by Nigella Lawson sent to me by my lovely friend in Boston, Stel of Babyrambutan. I have to remind myself that this is an American edition so I have to be aware of the 'sticks' in there and not substitute 'cups' for it. :)
 Old-Fashioned Chocolate Cake
1 1/2 cup plain flour
1 cup caster sugar (superfine)
1 tsp baking powder
1/2 tsp baking soda
1/3 cup unsweetened cocoa
3/4 cups unsalted butter - softened
2 large eggs
2 tsp vanilla extract
2/3 cup sour cream
* Frosting
1/4 cup + 2 Tbsp unsalted butter - softened
170 g dark chocolate (70% cocoa content)
1 Tbsp golden syrup
1/2 cup sour cream
1 tsp vanilla extract
2 cups icing sugar
- Preheat oven to 350°F/180°C/fan 160°C. Grease and line 2 x 8-inch/20cm round sandwich pans.
- In a bowl, sift flour, cocoa, baking powder, and bicarbonate of soda. Set aside.
- In another bowl, beat the butter and sugar until light and fluffy.
- Add in the eggs one at a time, mix well after each addition.
- Add the sour cream and vanilla, combine well.
- Stir in the flour mixture with a wooden spoon until well combined.
- Divide the batter between the 2 prepared cake pans and bake for 25-30 minutes.
- Remove from oven and cool for about 10 minutes.
- Loosen and take out from the pans. Cool completely.
- For the icing: Melt the chocolate in a heat-proof bowl over simmering water. Cool completely.
- Beat the all the ingredients together until well combined.
- To assemble: Put one of the cakes on a cake plate.
- Evenly spread some of the icing on it and then top with the other cake layer.
- Spread and swirl decoratively the rest of the icing all around the layered cakes.